Maintaining the Squeaks and Creaks of Your Hardwood Floors

Part of your house maintenance should include a yearly spring/summer inspection of your home’s structural quality. Think about everything that has happened this past year. How many pitter-patters of big feet, little feet and four-footed creatures have crossed your floors this past year? How many times has something spilled on your floor? Has your house had any temperature changes?

Daily living creates wear and tear on hardwood floors, whether we notice it or not. Sure, some nicks and scratches produce “character” in the wood, but over time structural damage can occur as well. You might imagine that those squeaks and creaks are only visits from the local friendly ghost, but there is a chance that your floor is telling you it’s time for some structural repairs. (If it is a ghost, at least it won’t do much damage to the floor.)

Squeaking, creaking floors indicate that there is likely a loose floorboard or two. To make sure everything is in place, look around the floor for any surface nails that aren’t flush to the floor. If nailing them to the surface doesn’t stop the squeaking, drive the nail slightly below the floor using a “nail set” to drive the nail in so you don’t add hammer marks to your floor’s character. (A nail set is simply a small nail shaped object that you place on top of the nail head to drive it in. The hammer bangs the nail set rather than the nail in the floor.) Alternatively, or if your hardwood floor doesn’t have surface nails, you can tighten the floorboard by driving in two nails, opposite each other, each at an angle that drives the nail towards the other and into the floor joist. If you can get under your floor, you can take the easy way out and simply put a wedge in between the loose board and the floor joist.

If you have gaps between your hardwood floor that are no larger than ½ inch, you can buy a wedge-shaped “fillet” of wood to insert in the gap, pound in and sand down. Unfortunately, if your floor is sagging, you’ll need to raise the floor with a metal column – or put in new floor joists. If your floors aren’t sagging – keep tabs on the moisture levels in your home and protect your wood with sealer.

There’s hardly any harm in a visit from a friendly ghost; but loose floorboards, gaps and sagging floors might not be so friendly to your feet. (Especially if you fall through to the basement floor.) A once a year maintenance check can keep your floors in shape and your family’s pitter-patters running safe without a squeaking, creaking sound.
How to Clean Hardwood Floors – 1.2

A popular new addition to many households throughout the country nowadays is hardwood flooring. It is reliable, elegant and seemingly easy to maintain. What people fail to recognize though, is that hardwood flooring must be treated properly if it is expect to last. Thus, when it comes to cleaning hardwood flooring, one must know the proper steps to take to get a satisfactory result without damaging the flooring.

The first thing that must be done is to create preemptive steps to make sure your hardwood flooring doesn’t get ruined. Place walk-in mats at doorway entrances to make sure particles of dust are collected and don’t ruin your expensive flooring. These act as “sandpaper” and over time will grate your floor. Most hardwood floors can be used on with a good swindel sweeper mop and quality wood floor cleaner. Do NOT use anything that might scratch or ruin your floor, such as steel wool to scratch out stains. Quality cleaner and an efficient mop should always do the job. If it is an extreme case such as spilled paint, you must learn more information on how to remove it. Yet in that instance, you would want to use paint remover.

Floors with a urethane finish should NEVER be waxed for it’ll ruin the floor. You could use a small cloth to wipe out pesky spots, alongside with good cleaner. Make to sure to minimize contact with water to your hardwood floor. Seeing as it is still made of wood, if something such as a spill or a flood happens, immediately get the water out of there. Something drastic as a flood might permanently ruin your flooring and cause you to replace it.

If it seems like your floor is beyond cleaning and repair, you might have to take things to a whole another level. For one, you should consider screening and recoating. Screening the hardwood floor will allow you to remove the old layer of coat and paint, and recoating will let you put on a new one. Its like taking off a bad cover and replacing it with one better.

If your hardwood floor is damaged with cuts and cracks, it might be time to replace it. You could try to fix the solution by filling up the cracks with chestnut glue, when if properly placed might result in an illusion effect. This might be a temporary fix-up, or a permanent one depending on how much you care about the look of your floor. If its in a hard to reach corner, you should probably not worry about it. But many scratches in the middles or near the doorway of a floor will probably just look bad on you and you’ll most likely have to swallow your pride, unloose your purse strings, and get a new floor.

Another thing you must avoid is overexposure to sunlight. Over time the UV rays will make your floor look dried up and shriveled. When you leave your household, make sure to close your blinds when light is unessecary. Another problem might be scuffing by furniture. When you are moving furniture around make sure to cover the legging with some kind of protective cloth as to make sure your floor doesn’t get ruined.

The more time and effort you put into making your hardwood floor look good, and making sure it doesn’t get ruined, the longer it will last you. Per say if you do a good job, it just might last you a century! And really, those extra little things add to you avoiding to have to spend thousands on replacing your flooring. After all, its much easier to keep and maintain than carpet, and looks better to. Be happy you don’t need a heated cleaner to take out that wine stain, yet instead can just wipe it right off!

Hardwood vs Flagstone

Floors in contemporary homes have come a long way. Wood and carpet are no longer the only options. Homeowners can choose from Ceramic tile floors, wood, vinyl, marble, linoleum and other beautiful choices. If you enjoy showing off your beautiful home, and floors, here are a few tips to make cleaning and condition easy.

HARDWOOD

Your beautiful hardwood floor might have a sealer on it like lacquer, varnish or shellac. If this is the case you will need to care for your floors with solvent-based cleaners and polishes. But if your floor is treated with polyurethane, you have a few more options for cleaning and shining your floor.

Hardwood floors can be cleaned with this really easy method. Two teabags steeped in a pot of boiling water. After a few minutes put the tea in something convenient to work with, like a bucket, and using a soft cloth soaked in the tea and then wrung out until it is only damp, wash the floor. The tannic acid in the tea will leave your wood floor with a beautiful shine.

To repair cracks in hardwood floors, borrow one of your child’s crayons, the color of the floor, and rub it into the gap, filling in the crack. Heat the repaired crack with your blow dryer and then buff the area with a soft cloth.

If you’d rather not use such homegrown methods, try cleaning your floors with a liquid floor cleaner for wood floors. Open a window or other source of ventilation since these stronger chemicals can combust. With a dry wax applicator, soak a small area and then wipe clean. When your floor is dry, buff it with a floor polisher.

FLAGSTONE

Natural stone floors give look contemporary and sophisticated. Cleaning these floors is a little more work than wood, but you will love the results.

Keep them looking their finest with a commercial sealer instead of varnish or lacquer. Dirt can be cleaned from your floor with a mixture of one-quarter cup of low-sudsing cleaner mixed with one-half gallon cold water and one cup ammonia.

Wearing work gloves and with an open window for ventilation, apply the mixture using a sponge mop. When ready to rinse the floor, use clear, cold water and buff dry with a soft rag.

Upkeep is an easier process using a damp mop with fabric softener in water and applied evenly with a mop. Fix a dull film appearance with a cup of white vinegar in water. Then sit back and admire your beautiful floors.

How to Remove Cigarette Burns in Wood, Formica, Fiberglass and Vinyl Flooring

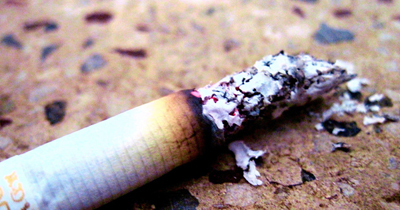
If you found a used coffee table or piece of furniture you love, but you’re not infatuated with the patchwork of cigarette burns, there may still be hope for repair and revival. The same procedures that can save a tortured designer furnishing may also save your vinyl floor that suffered from the burning exuberance of your last celebratory party.

Wood is wonderful. It’s durable and sandable – and sanding is your saving grace. If you have a cigarette burn in wood that you’re trying to conquer, you’ll need paint and varnish remover, sandpaper (or steel wool, depending on the wood), finishing paint or stain, and varnish. The hardest part will be matching colors. (If you were considering restaining or repainting your furniture – now is the time.)

Carefully remove the paint over the cigarette burn with paint and varnish remover. Let it sit a little while to let the chemicals do their work. After the paint is removed and cleaned up, sand down the area so the cigarette burn hole is less noticeable. Then, paint or stain your matching (or new) color, and varnish the area to protect it.

If the cigarette burn is on Formica, fiberglass or vinyl, use powder cleanser like Comet or Ajax (scouring powder) to remove the discoloring. After cleaning the cleanser, simply use an automotive polishing compound to get back the original shine. In a worst-case scenario, you might just have to patch an area with a new piece, or a piece stolen from an inconspicuous area of the same material. (You can probably get away with removing vinyl tiling in a closet or a snippet of Formica or fiberglass from under a tabletop or under a seat of a chair.)

OLYMPUS DIGITAL CAMERA

It takes some work to get rid of those nasty burns, but you don’t have to pass up an intriguing piece of furniture, and you don’t need to re-tile your kitchen floor every time you have a party. Enjoy life, and enjoy a home without having to look at cigarette burns.